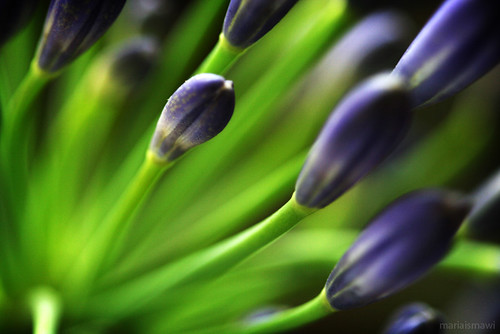
my 100mm is really a thing of beauty ya! lovin' it..
Thursday, December 13, 2007
Monday, July 9, 2007
woohoo!!
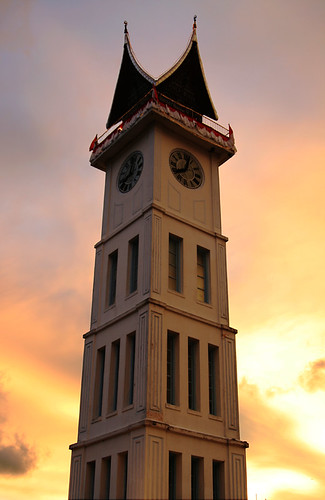
foto pertama gua yang menghasilkan duit!
hopefully this is going to be one of the pictures in BCA's calendar for 2008..
Tuesday, June 12, 2007
my latest development in flickrland
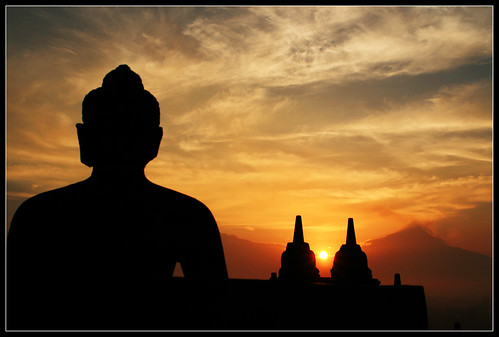
udah 21 foto yang ada di explore, and my photostream has been viewed 10,000 times! foto sunrise di borobudur ada di #5 tanggal 6 Juni 2007. That is the highest i've ever been and it was on the front page.. quite a development, i think..
Borobudur sunrise, so far 838 views and 74 people call this a favorite! that's like, a lot! hehe..
Borobudur sunrise, so far 838 views and 74 people call this a favorite! that's like, a lot! hehe..
Friday, April 20, 2007

Saturday, March 10, 2007
100mm f/2.8 macro
udah beli! sebenernya sih udah beberapa minggu yang lalu belinya. you can never get enough with this new hobby, you know. now you got what you wanted, and you just want more and more and more!!!
my watch, shot with the new lens. i think the title's pretty catchy:
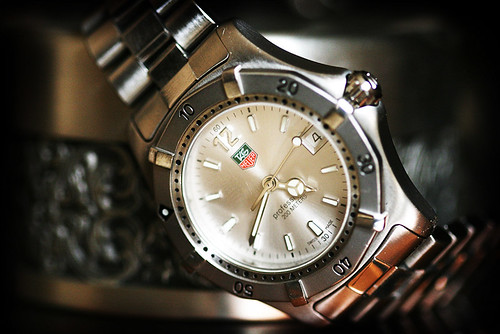
my watch, shot with the new lens. i think the title's pretty catchy:
"watch this"
Sunday, February 25, 2007

Friday, February 23, 2007

Friday, February 9, 2007
Wednesday, February 7, 2007
before and after
fotografer sabtu minggu suka banget sama hasil touch up foto ini. sayangnya ngga dicatet euy, langkah adjustment apa aja yang dibuat. oh well, anggep aja ini buat pamer i can do this kind of shit aja lah..
ini before:

and with the magic of photoshop and me jadilah yang begini ini:

ini before:

and with the magic of photoshop and me jadilah yang begini ini:
Tuesday, February 6, 2007
orton effect
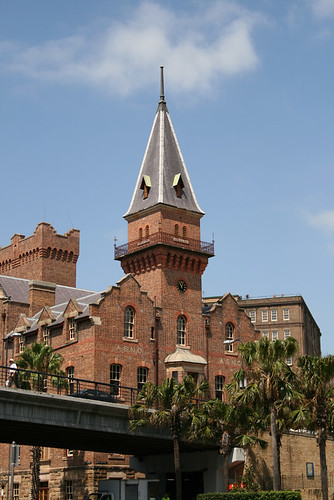
fotografer sabtu minggu baru pulang dari ostrali. jadi buat contoh kita pake hasil motret di ostrali aja lah ya..
ini foto the rocks yang diambil dari circular quay. siang-siang bolong, bo! jadi hasilnya agak-agak harsh begini.
ini cara bikin foto kita biar jadi agak-agak kaya lukisan. namanya orton effect, dari nama fotografer alam yang "menemukan" efek ini, Michael Orton. jamannya dia sih karena masih pake film, orang harus pake slide film untuk mendapat efek ini. luckily we now live in a digital era, jadi kita bisa mendapat hasil yang mendekati efek ini with the magic of photoshop!
1. obviously, first step would be to open the image. 'nya he-eh... ;o)

2. bikin terang fotonya. caranya, dari menu image > apply image trus ubah blending mode-nya dari normal jadi screen. opacity-nya biarin aja 100%. hasilnya foto yang over exposed begini.

3. duplicate image ini. caranya dari menu image > duplicate trus dibuat blur seperti gambar yang di bawah ini. caranya filter > blur > gaussian blur. set radiusnya antara 15 - 50 pixel. gimana selera aja, tapi jangan kelebihan. untuk foto ini fotografer sabtu minggu pake radius 25 pixel (ambil tengah, cari aman...)

4. drag and drop si blurred image ke image yang over exposed. now you might ask: wuaduh... naha jadi kieu euy?
 5. don't worry, be happy... dari palette layer kita cukup ubah blending mode dari normal menjadi multiply. tadaaaa... no drama.. (man, wouldn't it be so fun if i could actually add the tadaaa sound here?). jadi deh..

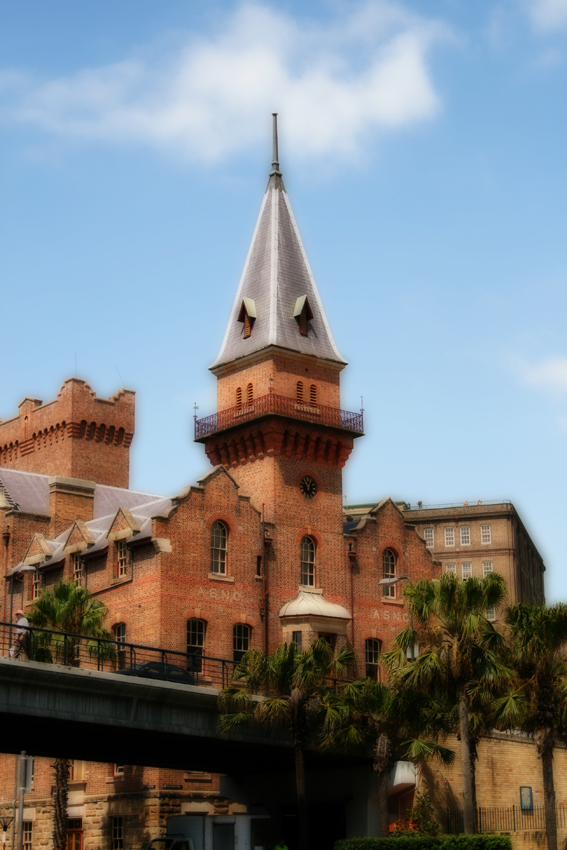
6. jangan lupa, biar bisa di-save dalam bentuk jpeg kedua layer ini harus disatuin dulu lewat menu layer > flatten image. trus ya sudah, save lah your painting-like picture itu.
biar lebih jelas, ini hasilnya:
Monday, January 15, 2007
Border
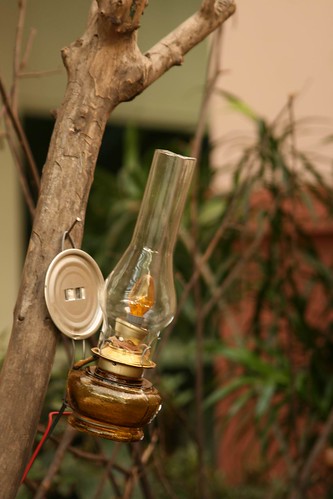
Weis... tips pertama dari fotografer sabtu minggu nih.
Bagaimana membuat border, atau tepatnya menggunakan border yang sudah ada untuk foto kita dengan photoshop.
1. Buka file border

2. Buka file foto yang mau dikasih border

3. Drag and drop background layer border dari layer palette ke foto

4. Di layer paletter foto, double click background. Ini akan membuat background menjadi layer sendiri
5. Click OK
6. Taruh layer foto di atas (swap layer)
7. Dengan layer border selected, tekan Ctrl T kemudian Ctrl 0 (nol). Ini membuat kita bisa me-resize background supaya besarnya sama dengan ukuran foto. Setelah sama besar, tekan Enter
8. Ubah blend mode layer foto menjadi screen.

DONE!
Gampang kan?
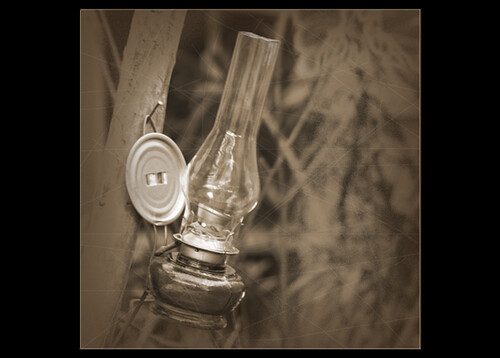
Ada macem-macem border yang tersedia. Tinggal pilih. Ini contoh foto yang sama dengan menggunakan border lain:

Sumber: photoshop support group on flickr
Bagaimana membuat border, atau tepatnya menggunakan border yang sudah ada untuk foto kita dengan photoshop.
1. Buka file border

2. Buka file foto yang mau dikasih border

3. Drag and drop background layer border dari layer palette ke foto

4. Di layer paletter foto, double click background. Ini akan membuat background menjadi layer sendiri
5. Click OK
6. Taruh layer foto di atas (swap layer)
7. Dengan layer border selected, tekan Ctrl T kemudian Ctrl 0 (nol). Ini membuat kita bisa me-resize background supaya besarnya sama dengan ukuran foto. Setelah sama besar, tekan Enter
8. Ubah blend mode layer foto menjadi screen.

DONE!
Gampang kan?
Ada macem-macem border yang tersedia. Tinggal pilih. Ini contoh foto yang sama dengan menggunakan border lain:

Sumber: photoshop support group on flickr
Sunday, January 14, 2007
Ola!
"belajar motret" ini bakalan jadi tempat fotografer sabtu minggu nyatet dan sharing tips-tips buat belajar motret yang didapat. Cita-citanya sih tips-tips yang ada di sini adalah tips yang udah tried and tested by fotografer sabtu minggu. Sumber bisa jadi dari majalah atau blog-blog fotografi favorit atau dari flickr groups.
with fotografer sabtu minggu always being too relaxed about everything, moga-moga blog ini bisa dikerjain deh..
with fotografer sabtu minggu always being too relaxed about everything, moga-moga blog ini bisa dikerjain deh..
Subscribe to:
Posts (Atom)